The final reveal: The Dining Room

This one has been a long time coming… It’s been a year since I started this blog, and almost 3 years since we first viewed our house, so it seems a good time to bring the story to an end.

As a room, this one has been on the to-do list since Day 1. One of the first things we did after we picked up the keys, was to get the builders to rip down the dining room wall, so we had to make it work pretty quickly!


Progress was made before we moved in. Although not much!

As a functioning room, however, we had to wait quite some time! I suppose everyone says they have ‘one of those rooms’ which gets trashed, it’s just a shame ours is so open to the rest of the house! It’s surprisingly easy not to notice how shocking something looks when you’re living with it everyday!…

DSC_0144

Generic dining room carnage, circa 2015.

Let’s start with the basics. Now the dining area incorporates the downstairs hallway space, it’s a really decent sized room – around 3.5m square at the widest points, but I would say that the lack of natural light is the main negative. The only direct light we get is through a glazed door which opens up onto the side return path, down the side of the kitchen and into the garden. It’s East facing, and due to being mid-terraced, not a lot of light comes in. Another negative in terms of making progress in this room, is its central location. It is literally in the middle of the house, and therefore, makes the perfect dumping ground!

When we first moved in, we had the walls damp treated and re-plastered, so it was a lovely smooth, blank canvas, but aside from that, not a lot happened until a lot later, and it went through various guises, as you can see…

It started out as a small, ugly room:

5419_HCP10975_IMG_01_0000_max_656x437

Then, transformed into the builder’s yard:


Strange that I have so many pictures of it looking awful. But then again, maybe that emphasises just how long it was like this for!

Then it was the kitchen:


…because the actual kitchen looked like this ^

Then, briefly, it was a dining room:

DSC_0105

We ate fajitas and drank wine to celebrate!

Then it was the bathroom storage area:

DSC_0279

And finally, with walls painted and floors put down, no more rooms to do, and no more crap to store, it became the actual dining room!

94069_27502194_IMG_08_0000_max_656x437

Hooray! And thanks estate agents for this excellent photo!

Due to of the lack of natural light, and no break between this space and the hall/stairs/landing, I knew that we needed to keep the walls a light colour. I tried the good old ‘Brilliant White’ for a while but due to the lack of natural light, it was just cold and dull, so after 12 sample pots (seriously by the end even I could barely tell the difference between them) we settled on Dulux White Cotton. Then about 6 months later I changed it, with much protestation from Husband, to Dulux White Chiffon and it is so much better! The White Cotton (left) had quite a grey tone, whereas the White Chiffon (right) is definitely a warmer colour, which is what we needed. Can you tell the difference?!?…

Image result for dulux white cotton Image result for dulux white chiffon

Not a lot in it, but me and my magic eyes are much happier now!

As with most of the other rooms, by the time it really came to dressing the room, we had already decided to emigrate, so we had no need for, and no money for, fancy new furniture or the ‘perfect’ things that if we were staying here, I would have invested in. I had already bought 6 of the Eames style dining chairs from Aldi on one of their ‘Scandinavian design’ events, and they’d been kept in the boxes for about 18 months. We kept the used furniture we had adopted from family members, charity shop finds and to finish off, we went on a Ikea rampage for a few bits to finish things off and provide us with some storage.

As a fairly temporary situation, I’m happy with it, but I certainly wouldn’t say it is my perfect dining room. Having said that, I love the chairs, I love how light and open it is and I have my essential pops of yellow involved, so it’s not all bad!

Image result for 40 aldsworth road, cardiff

So, I think this finishes off the round up of all my rooms for our little Secret Yellow Home, so thanks for reading guys. It’s been a roller-coaster!

Posted in Inspiration, Our House | Tagged , , , , , , , , , , , , , , , | 1 Comment

The hall, stairs and landing

This can often be an overlooked part of a house – especially when it’s not grand, not big, and not well lit – like ours! Terraced houses in this area all have the same narrow, Victorian hallways – with varying degrees of ‘open-plan-ness’ thank’s to decades of refurbs.

Ours started as very un-open-plan except for being open to the kitchen at the end, only separated by a bizarre voile curtain on a wire situation. That didn’t last long. The first job we had done, was to take the wall between the dining room (middle room) and hallway down, so the hall would lead passed the separate lounge to an open dining room, leading to the already open kitchen.

Usually in these houses, the front room (lounge) and middle room (dining room) are knocked into one, but this still leaves a separate kitchen which isn’t big enough for a table. So, we figured our plan would be a more functional, sociable way of using the space we had, without having to fork out on extensions. It was actually the estate agent’s idea, but I don’t mind taking the credit.

Aside from this main decision, there hasn’t been much in the way of major changes, it’s just been a case of re-decorating to make it lighter, new flooring, lots of glossing of woodwork and a few accessories here and there. It still looks fairly bare, but it’s such a tight space, we didn’t want to over-clutter it, and if there’s anything in the world of Interiors that bugs me the most, it’s ‘gallery walls’ full of meaningless stock artwork. Mini rant over.

So here’s some before and afters to illustrate the work we did!

The dining room wall situation.

Before and after…

And a cheeky little dining room preview!

The landing.

DSC_0225

I forgot to mention that for whatever reason, all our internal doors were painted pale blue. Very odd considering nothing else in the house was blue. Also, we completely stripped the wall on the right back to the original lath and plaster and then re-boarded it, and had it re-plastered, as the original plaster was blown and cracked and so bad that the wall moved when you pressed it! Eek! Looks lovely like this though, doesn’t it?!

Before and after…

It was too yellow, even for me!

We re-instated the glass panels above the bathroom door to allow more light into the landing and fixed some balls to the top of the newel posts (I thought they looked like they should have them when they didn’t)!

The new carpet is a 100% wool grey and cream pinstripe – it doesn’t photograph great in wide shots, so here’s some close-ups. One of my most favourite things is how it’s cut and fitted between the balustrade spindles. I’m sure it was the fitters’ favourite job of the day!

The hallway.

Before and after…

This next before and after is my favourite…

My bright yellow door is the finishing touch!

I can remember walking in on our first viewing and being totally sure we could make it nice, but now looking back at how grim it was, I’m surprised we really had the vision and so proud of how far it’s come! I think the entrance is a tad more welcoming now!

Some details.

The coat hooks were from a second hand shop in Cheltenham, the landing has transformed into Husband’s guitar storage area/Beatles shrine, and the lights were a bargain pick up from a B&Q reduced to clear sale – I just love the shadows they cast!

So there you have it. Not hugely exciting, but sometimes a neutral colour and simple details is all you need to make a huge difference to open up the space downstairs and lighten up the landing. I hope you like it too!

Thanks for reading!

Posted in Our House | Tagged , , , , , , , , , , , , , , | 6 Comments

Where have I been – this time?

So last time I went AWOL it’s because I was having too much fun and going on holiday. This time I’ve been a bad blogger for almost 2 months! Oh deary me.

I do have 2 fairly good reasons why my head has not been in the game though…

1 – Work

So this time of year, in my day job, it is all about one thing – Christmas! Or rather, the dreaded, Pre-Christmas delivery cut off dates. FYI it was yesterday, so if by some magic you know where I work, this is my worldwide announcement that “No!” you can’t have your bespoke curtains fitted before Christmas now. Get over it.

But what it does mean, is that for the last few weeks I haven’t even known what I look like. Who has time for mirrors when IT’S ALMOST CHRISTMAS!!! Spoiler. It’s not. There’s still 6 weeks.

I’ve never quite understood the idea of getting brand spanking new stuff in time for Christmas. Yes, it means you can show off your swanky new home furnishings to your “friends and family”, or whoever you’re stuck in a continual one-upmanship competition with, but I’d much rather my drunken relative (Ok, I mean me) spill their cherry-coloured beverages over my crappy old carpet, or use my limp temporary readymade curtains as a way to haul themselves off the floor, not the fancy thousand-pound* embroidered stunners I’d just had installed. But there we go – apparently, I am in the minority.

Alongside this, I have also been doing some copywriting work for friends and their websites. And whilst it is hugely fun and exciting, it is time-consuming and slightly worrying that it seems that basically the whole of the internet is made up of a series of copywriters using each other’s work as a basis for their own articles. Just saying – if you ever need to find out something serious – don’t use the internet. It’s probably someone like me who wrote it.

2 – The Future

So, this is probably the bigger, slightly more “Holy Sh*t” reason as to why my mind has been elsewhere. For about a year now, things have been a-happening in our household with regards to our future. When I’ve told our friends and families, and started the sentence with;

“Husband and I are…”

you can tell everyone is expecting us to be expecting. Sorry Parents, you’ll have to wait a while longer to be Grand-People. I have seen the slightly disappointed faces, vague looks of confusion and general concern. Until I finish the sentence with;

“…moving to Australia!”

Yes, it is true. The Robbins’ are emigrating and we are bricking it!

facebook_1510392669734

This is me in Brisbane almost 4 years ago… And come 5th June 2018, this is where we’ll be calling home! 

When we first started the Visa process last year, it was kind of a 50% chance we’d get through all of the obstacles lying in wait. Husband, luckily has qualifications and skills which are in demand over there, which is how we have got our Visas, but he still had to do a seriously hardcore English test (despite being English for his whole life!) to prove that he could read, write, speak and listen to English and prove that he understood what he was reading, writing, saying and hearing. And, as if that pressure wasn’t enough, due to the fact it’s a points-based Visa we were applying for, he had to get top marks to boost our points, as after he turned 33, we lost 5 points. According to Australia, 33 is when life starts going downhill. Lol.

He also had to do a skills assessment which entailed so much paperwork that it cost £15.00 to post it all to our agents in London. That is a lot of paperwork! Hilariously, they actually changed to an electronic system the day after we posted it all, so we had to have it all posted back, to scan it all in and send it as an email. Major lols.

Meanwhile, all I needed to do was tell them my name and show them our wedding certificate to prove I wasn’t just married to him for his money! Even bigger lols.

So anyway, after a nerve wracking 4 month wait after submitting our application in the Summer, having medical tests and police checks to prove we aren’t going to cost their medical system millions or be super dodgy, we had our Visas approved on the 23rd October.

**Insert picture of us excitedly waving our Visas to the camera.

I can’t actually do this photo, as it turns out that Visas are electronically linked to our passports, so you don’t actually get ‘A Physical Visa’. I feel like they could have at least printed something on a bit of paper for us, considering how much we’ve paid for these imaginary Visas.

Anyway, it seems that now Husband has gone through all of the trauma getting us our Visas, it’s going to be my turn to actually get us there. We have booked our flights, so we have an end date, so now it’s a case of finding jobs, finding somewhere to live, getting all our crap over there, closing all our accounts over here and opening accounts over there… Oh, and selling our house! No biggie.

But never fear. I am hoping not to be such a terrible blogger and at least finish what I started, which is showing you all what we did to this house – before we leave it! I still have the hall/stairs/landing and dining room to talk about, as well as all the little finicky bits we’re doing now to spruce the place up to get it on the market after Christmas. I dare say I’ll keep you posted on the sale/emigrating process too if it’s not too boring for you!

Strangely, when we bought this place I remember saying that I couldn’t imagine living in it for much longer than 3 years. It’s only small and not a perfect location, but it got us on the ladder (only for us to spectacularly jump off it again now)! As it turns out, all going to plan, we will be moving out exactly 3 years after we moved in. Fate, I like to call it.

Thanks for reading people. I would appreciate any words of enthusiam, positivity or reassurance! If you’re feeling like a Negative Nancy, please don’t leave a comment. Thank you in advance…

*Just in case Husband ever reads this, this is my disclaimer to say that unless I won the lottery – and I’m talking major huge jackpot – I would never spend a thousand pounds on a pair of curtains.

Posted in Our House, Uncategorized | Tagged , , , , , , , , , , , , , , , , , | Leave a comment

Pick of the week #20

Hi everyone! Hope you’re all having a great weekend.

With the resurgence of chintz and all things floral we’ve been seeing over the last few months, I have been eager to see what English country-style Gods, Colefax and Fowler, have come up with for their new fabric collection, and they haven’t disappointed me.

So, this week’s top pick, you guessed it, is some more fabric! This time, in the collection entitled “Rosella” and with tonnes of indigo and sky blue tones, mixed with rosy reds, linen textures and glorious florals it’s bringing out my inner Country Lady.

1003487

While I don’t think owning my very own sprawling country pile is a likely turn of events, I do long for the day I have a client with one and a healthy dose of trust (and unlimited budget if we’re really dreaming), to let me turn it into my own perfect Country retreat! I absolutely love how this combination of 7 different patterns is completely livable, thanks to the concentrated colour palette.  And a nice big sisal rug? Gorgeous textures.

1003463 1003483

Left: Cassius – Right: Carmen

Somewhat controversially, considering I don’t have any red in my own home, I think these two curtain fabrics are potentially my favourite designs from the whole collection. And I do love a nice big squishy checked armchair…

1003470 1003480

Left: Leora -Right: Aragon

Although, of course, I do still love the cooler tones in these two more geometric offerings. An ombre large scale damask (Leora) will always be a winner if you’re after a subtle pattern for a classic scheme.

So there you have it, another brief round-up of an absolute gem of a collection. Hope you like it too!

Posted in Inspiration, Pick of the week | Tagged , , , , , , , , , , , , , , | Leave a comment

The Bathroom – The final hurdles

Well done! You made it through the first part! And I promised you a saga, so here it is! Enjoy…

Fitting the bathroom

I think the first problem we had with the project, was that we thought, because Husband is a gas engineer and as such has done a bit of plumbing in the past, that bathroom installation would be easy.

Because of this ridiculous notion, we gave ourselves an even more ridiculous time-frame to do it in.

Because things like sealant and silicone say things like “don’t get wet for 72 hours after application” (but in more technical words) we thought it would be a good idea to fit the bathroom just before we went away on holiday, so it would have a fortnight while we were away, sunning ourselves and enjoying a friend’s big fat Greek wedding, to dry out and get all waterproof.

The only issue with this was that it meant we had to rip out the bathroom, get half of it re-plastered, tile half of it, lay the floor, re-fit the plumbed in bits and decorate, all in the 6 days Husband had off before we flew away. And I already had plans to be away for 2 of them.

The Plan – supposedly

  • Day 1 – rip out old bathroom, plasterers to come and re-plaster bits of walls not being tiled
  • Day 2 – Build frame for new cubby holes for toiletries behind the shower, plumb in the bath
  • Day 3 – Lay the subfloor and lino. Start tiling
  • Day 4 – Finish the tiling and apply pre-grout tile sealant. Undercoat walls to be painted
  • Day 5 – Grout tiles. Fit sink unit and toilet
  • Day 6 – Paint plastered walls. Apply post-grout tile sealant.

What could go wrong?! Hahahahahaha. Turns out, pretty much everything…

The Reality

Day 1 of 6 began with the plasterers cancelling, just after we were already too far to stop, seeing as we managed to take half the plaster off the wall with the tiles around the bath and taking the PVC frame off the wall around the window exposed BIG GAPS in the walls around the window. Why the PVC was there made more sense after we took it off. Another interesting lesson in hindsight.

We were going to do full height tiles in the bath area only, but now we changed plan thanks to the lack of available plasterers and BIG GAPS. We filled in the BIG GAPS with a tonne of expanding foam and made a last minute trip to our fab local Topps Tiles shop to get enough tiles to go full height all the way round from the shower end of the bath, around the window, to the corner of the boiler cupboard wall. The boiler cupboard and rest of the walls would have to be left and plastered/decorated at a later date.

End of day one, and essentially we have this;


Exposed brickwork in the shower area anyone? Maybe it’s the next big thing!…

And the pre-arranged schedule is already out the window. Ah well. “The best laid plans of mice and men often go awry.” And in fairness, it wasn’t the best (most realistic) plan anyway…

Day 2 of 6 was spent by Husband (because by this point I was away for the weekend on a school reunion) batoning and plasterboarding the wall behind the bath/loo/sink and around the window to hide the fact we’d pulled half of it off the day before. Here, he also managed to baton out and use some waterproof board at the shower end of the bath to create the little cubby holes for toiletries. He used the wrong measurements however, so they ended up not central to the bath.

“Who’s gonna notice that?” He says. And breathe…

Day 3 of 6 was spent by Husband (I was quite drunk and blissfully unaware) taking up some floorboards to start the plumbing-y stuff for the bath and finding that the majority of the original pipework was a different diameter copper pipe to those you get these days, so the new fixings wouldn’t fit. A trip to the plumbers merchants and a bunch of fixings later and he spent a whole day changing pipework – which he hadn’t planned on doing at all…

Day 4 of 6 and I was home. Pipework was sorted and floorboards were back down, so essentially it still looked pretty much the same as when we started except there was no bath! We wrangled the bath into place, adjusting and re-adjusting the little legs for an incredible amount of time to try and make it level, on a seemingly very un-level floor! Husband plumbed that in and progress was being made!

We then laid some large sheets of 3mm hardboard over the floorboards to level everything out for the lino – what we didn’t do however, in our stress- addled brains is think about leaving any expansion gaps. That comes back to haunt us. Laying the lino was relatively painless, apart from trying to get the one big sheet of it into the right place to start with – and trying to line up a geometric pattern along a wall which isn’t square with any of the others is quite a challenge! We then started tiling in the corner of the wall by the boiler cupboard and it’s finally starting to look a bit better! Hooray! But it was taking us a lot longer than we thought it would to do the tiling… see a familiar theme appearing?!

Day 5 of 6 and I’m back to work. I get a phone call from Husband at about 9am asking me why I didn’t notice the water running down the kitchen wall when I got up. The bath had been leaking all night and in my stress-haze I hadn’t even noticed… Cue crying in the stockroom. The lino comes back up – luckily we hadn’t glued it down – and bath comes back out. Floorboards come back up. Leak is identified, fixed, floorboards go back down, bath goes back in, lino goes back down. Husband had a tiny mental breakdown. Understandable.

I get home from work. There’s a big brown mark on the freshly painted kitchen ceiling. Oops. We did some tiling – however, we were fairly limited on how late we could do this considering our very young neighbours and the almighty racket the tile cutter made! We almost got the wall with the window done, but still not great. About 2.5 sq m, out of the 15 sq m total!

Day 6 of 6 (hahaha) and we were both off work. We had until about 6pm when we needed to stop and pack our suitcases and leave for Birmingham to stay at the in-law’s before catching our flight the following day… Or so we thought!

The tiling took for absolute ever!! Definitely a lesson in why maybe a ceramic tile would have been a better/easier choice… We had to use special adhesive for natural stone tiles which we had to mix by hand, was quite thick and heavy, and went off super quickly, so we had to make it in really small batches. Each tile that needed cutting had to be marked, taken outside and cut on a diamond tip tile cutter. Although we had thought we’d set the bath to a height which meant there would be a full depth tile at the height of bath, the floor obviously really wasn’t level, so every tile around the bath had to be trimmed.

We did get quite a good system going, where I would mix the adhesive and affix the tiles to the wall, while Husband would mark the tiles to be cut and go and cut them. And repeat. The novelty wore off far too soon, but we did actually get all of the tiles on the walls before leaving! Small victory!

However, it really was a difficult time, and by far the worst part of our whole renovation. I remember crying whilst tiling, not being able to feel my fingers anymore because they were so sore and barely being able to mix the adhesive by the end of day with such tired arms.

We left Cardiff at 11pm, after non-stop tiling for 14 hours. All of our holiday stuff was in black bin bags on the backseat and our suitcases in the boot as we didn’t have the time/energy to pack! We got a KFC at the service station on the M4, but even that wasn’t very good.

I realise it really does sound pathetic, but it was the most exhausted and stressed we had ever made ourselves! With pretty much every step of our plan going wrong in some way, in conjunction with the feeling that we were massive failures because of how much we still had left to do by the end of our self imposed timeline.

We did have a wonderful holiday – mainly consisting of sunbathing, naps, beer, wine, cocktails… you get the drift! But the story obviously doesn’t end there, with a less-than-half finished bathroom! But I’m aware this post is getting longer by the word (!) and seriously lacking in pictures – who has time for pictures with all this horror going on?! – so I’ll round up relatively quickly;

  • Get home from holiday and it looks like a crime scene. The whole house is covered in a fine covering of tile adhesive powder, because no, we didn’t bother to mix it outside! So we have to clean everything (even the sofas) before we can sit down
  • Cry
  • Clean the tiles and apply the pre-grout coat of sealant.
  • Next day, I spent 7 hours grouting the tiles – again it was a special product for natural stone tiles which, again, I had to mix by hand in really small batches, so it was a constant battle between getting the whole batch onto the wall before it dried up in the bucket, and working around behind myself getting it cleaned off the tiles before it dried up! Good for the guns, but a soul destroying day none the less!
  • Went to the public swimming pool for showers
  • Husband plumbed in and fitted the sink unit and toilet relatively painlessly, but the shower caused various issues, and given that the pipework by this point was behind a layer of waterproof board and tiles that I was no way taking off and doing again, was a tad stressful. Eventually he got it sorted, but we couldn’t use it because the sealant round the bath needed drying time – remember the plan?!
  • 3 weeks later, the plasterers finally grace us with their presence and the other half of the room starts looking more finished.
  • A couple of weeks later and it’s all painted, a blind is fitted, a mirror is put up, a light is installed and we finally have a bathroom!!!

So, the 6 day plan turned into a 9 week saga, but here it is in the form of some ‘before and after’ shots…


The main views – before and after – was it worth it?


The view into the bathroom from the top of the stairs, and the giant cupboard doing an excellent job!… no colour coordinated towels as yet…


What I like to call ‘botanical corner’ finished off with a couple of pages out of an old book of flowers found in a charity shop, in some Ikea frames, providing the essential touch of yellow!

And finally, to tie this all in with Part 1;

What I am most annoyed by

  • We didn’t leave expansion gaps around the hardboard floor, so now it bounces and makes a little knocking noise when you walk on it which is quite annoying.
  • We didn’t quite know how to fit the bath panel so, occasionally, it pops off!
  • The toiletries cubby holes AREN’T CENTRAL TO THE BATH – by 0.5cm but still!! Argh!
  • I didn’t do an excellent job of tiling/grouting, mostly because a) I hadn’t done tiling on this scale before, so obviously wasn’t going to get a perfect finish and b) I was so knackered I didn’t care enough by the end of it, and that fact annoys me now.
  • We pre-drilled the holes in the edge of the bath for the bath taps. We didn’t think about the depth of the tiles around the bath, so there is barely a gap between the taps and the tiles. By pure luck, we can still turn the taps fully on, however, it’s very tricky to clean the sealant behind them and it annoys me that we didn’t consider this first
  • Venetian blinds are a pain in the ass to clean. I knew this, and still I bought one
  • Our towels aren’t colour coordinated with the scheme, but we can’t afford new towels just now.

So there you have it. We do have a lovely bathroom now, but I don’t think we’re in any rush to do it again. My advice for others (as if anyone will take my advice after reading this haha) ??

Don’t think it will be straightforward and don’t try to do it on a tight deadline – there are way too many things which could go wrong/take longer than expected, and you won’t know until you start. But essentially, the feeling of accomplishment when it is done, is pretty cool.

So, what do you think? Worth the effort (P.s – any negative comments are still likely to send me over the edge)!! Thanks for reading guys. Now, definitely time for that vodka cuppa…

Posted in Our House | Tagged , , , , , , , , , , , , , , | 1 Comment

Pick of the week #19

This week, it’s the turn of one of my constant inspirations, Designers Guild, and their new AW collections! I did warn you this month was going to be fabric-tastic!

This season, Designers Guild have a mahoosive total of 9 new fabric collections – two main decorative collections and 7 coordinating weaves and plains – and two new wallpaper collections.

It, as expected, is all absolutely gorgeous. A riot of colours, patterns, textures and moods, I can’t wait to share my favourites! So, here they are;

DECORATIVE

Image result for tulipa stellata fuschia Image result for tulipa stellata fuschia

Tulipa Stellata Fuschia

This fabric is just stunning – it has a huge pattern repeat, and I too would pick out the greens and aqua colours for highlights in the rest of the scheme, as the pictures above demonstrate, to cool it all down and let the fabric stand out.

Image result for delft velvet noir Image result for delft velvet noir

Delft Tulips Noir

I adore the drama in this velvet fabric. As above, I would use it sparingly as an upholstery fabric or as big squashy cushions on a pale sofa, for maximum impact, without darkening a room too much – let’s face it, not many of is actually live in vast spaces like these room sets!

TEXTURES AND PLAINS

Image result for grasmere kingfisher Image result for grasmere kingfisher

Grasmere Kingfisher

I do love a textured plain, and this multi-tonal teal number is a stunner. Also available in 37(!!) other colours, there’s sure to be one to suit you if it’s a boucle style, machine washable, hard-wearing gem you’re after.

Image result for sesia peony Image result for sesia peony

Sesia Peony

This semi-plain woven fabric has a subtle shimmer, which if you’re looking for a simple yet eye-catching curtain fabric, would be a great choice. Again, it’s available in a tonne of colours, from the purest whites, right through to this pink and an equally exciting turquoise option. Tres chic.

So there you have it – my round up of the best bits from Designer’s Guild fabrics this season! Do you like what you see? Head over to their website to see all of these lovely images – and many more, for all your fabric inspiration needs!

P.s. – I have had to be extremely ruthless just to feature 4 – I could pretty much write up a reason to use every single one of them!

Posted in Inspiration, Pick of the week | Tagged , , , , , , , , , , , , , , , , , | Leave a comment

The Bathroom – Preliminary stages

I’ve been building myself up to start this post. It’s going to be a biggie, so apologies in advance. I’m going to split it down into two (like with the kitchen) but still, you can reward yourself with a cup of tea (or something stronger if you need it) when you get to the end! Or maybe get one now – you might need it!

First things first. Where’s the bathroom? Unlike most houses round here, our bathroom is upstairs (it originally would have been the third bedroom). The door is right in front of you when you get to the top of the stairs, and it sits above the kitchen. “That makes for a pretty big bathroom” I hear you say. Yes – it does! Which in part is why we could do what we wanted to with the design, because space isn’t an issue – it’s approx 3.2 x 3.7 metres.

After the whole renovation, the bathroom is the room I am both most proud of and most annoyed by. We’ll start with the good bits;

Why I am proud

  • It is the one room which turned out to look exactly as I wanted/imagined without compromise – mostly.
  • It is, I think, the most interesting room in the house and the room which looks most ‘designed’ rather than just cobbled together!
  • While we definitely did not get it done in the (ludicrous) timeframe we originally gave ourselves, we did get it done before we started looking and smelling like homeless people. Just.
  • It is a serious transformation.

The story

So here’s the before pic from the estate agent’s particulars, which in all fairness could have been worse:

5419_HCP10975_IMG_05_0000

Mmmm beige…

The day after we got the keys, Husband took the boiler off the wall. Being a gas engineer, I’d told him that the boiler/radiators were his domain and to do what he wanted, and after about 5 seconds he’d found out that the ‘perfectly reliable gas central heating’ didn’t actually work. Luckily the shower was electric so we did have some hot water, and at this point we weren’t living here, so it just meant the builders had to make their tea in the bath. Fine.

Aside from a quick-ish swap over to a nice new Vaillant combi boiler, the only other immediate work, while we had no boiler, was to strip and re-plaster the wall it sits on. As you can kind of see in the pic above, the boiler part of the wall is proud of the window part of the wall. That’s because it is the old chimney breast from the rear chimney which would have served the original Victorian stove in the kitchen.

When we bought the place there was an actual hole you could feel the breeze through in this wall, from where the chimney stack had leaked and cracked and the damp had blown all of the plaster internally. We removed the chimney stack entirely and had that part of the roof tiled over, easy peasy.

While there was no boiler on the wall we had a very enjoyable day of taking the blown plaster off – which took shockingly little effort! – and re-boarded it, ready for a new skim.

That pretty much sums up the total amount of work done in the bathroom for the first 10 or so months. We really started to mess things up when we sorted out the utility room/kitchen and again, it was instigated by Husband and central heating needs…

So, to put a radiator into the utility room to make it a usable space rather than a dumping ground, the central heating pipes under the bathroom floor needed to be accessed, to put a new joint onto, to run through a hole “we” cut into the kitchen ceiling and through the wall into the utility room which is a single story extension. Simple.

However, to access the central heating pipes, we needed to take up the bathroom laminate floor. To take up the bathroom laminate floor, we basically had to trash the bathroom laminate floor. The floorboards underneath, no matter how solid and how many times I hoovered/mopped, was in a similar state to those you’d expect in a derelict drugs den. Covered in paint splodges, random blobs of plaster and sealants, it was rough under foot and just plain manky looking.

We lived with it for a few months – we even tried piecing the laminate back together in the heavier traffic areas, which just didn’t work – but this, combined with the fact that the electric shower really was rubbish and the insipid Cowparsley patterned tiles were really doing my head in, prompted us to make a plan.

Step one was to take the ceiling down and re-do it. It was pretty much falling down anyway, again thanks to the leaky chimney. It was just held in place by woodchip wallpaper, so this was a horrendously messy but relatively painless process… until I was the one having to help Husband to re-board it. Plasterboard is heavy and when you’re stood on a ladder holding a 1.2×1.8m sheet of it above your head, it’s even heavier.

I think we had a Dominos delivery to reward us for that day. We got it re-plastered by someone else.

Step two was a slightly structural type job and was part of an additional plan to make the landing lighter, by reinstating the glass panels above the door, so the light from the bathroom would spread. For whatever reason, the previous owner had just painted the original glass panels that were there. Still can’t understand why. We made some new frames and ordered some bits of glass and it made a huge difference.

dav

From the landing side of the wall

Boilers are ugly and we own a lot of stuff, so step three was to make a big cupboard for that corner of the room to hide it all. The room is well big enough for a giant cupboard…


How exciting! We have a plastered wall with no holes behind the shiny new boiler, a plastered ceiling with new loft hatch and a nice wooden frame for a big cupboard. And look at that pipework. Dreamy. But also, take a look at those floorboards. Not so pretty.

Step four was to decide what we actually wanted for the new bathroom! And bizarrely, given that I have no previous experience in bathrooms, and didn’t make a single Pinterest board for bathrooms, I somehow knew exactly what I wanted. It might have come to me in a dream and I’m not even joking. I have exceptionally mundane dreams.

So, I knew I wanted travertine tiles on the business side of the room. I just love the variation in colours, warmth of tone and slight Mediterranean feel to them.

Related image

Plus, our tiled area includes two window recesses and two cubby holes for toiletries and I didn’t want to have the hassle of using metal edging like we did around our tiled splashback in the kitchen to hide the ceramic edges, so natural stone tiles, with their own nice looking edges, was the only way to go.

Within 5 minutes of getting a Little Greene paint chart through the post I knew I fancied Tracery II walls – a light greyish green.

Related image

So then imagine my delight when I flipped the chart over and read their description for it;

“Tracery II – No 78. This lighter version of Normandy Grey (No.79) is a very sophisticated colour favoured by architects it can be used with great style to off-set limestone, marble and granite”

Ok, so we were getting Travertine, but it’s quite similar to limestone! Mother was staying at the time and I remember her squealing “Ooh aren’t you so clever with your colours” at me. Well I am an Interior Designer, Mum…

Anyhoo, the third thing I knew I wanted was a patterned floor. I was hoping for a nice Victorian tiled hallway downstairs, but when that didn’t materialise from under that load of laminate, I thought the fun place to put it would be the bathroom. After a brief dalliance with the idea of actual tiles, and a visit to a friend’s house who had just laid a fab hexagon patterned lino, we decided on the much cheaper, practical, and warmer under-foot sheet linoleum option. A cheeky “cheap patterned lino flooring” Google and I found this little beauty on eBay…

Image result for lisbon vinyl floor ebay

Flooring – done!

The last thing that I really knew I wanted was a vanity unit. I wasn’t quite sure on the style, but I knew that I didn’t want to end up with shelves or clutter anywhere else, so I wanted storage for our day-to-day toiletries and boring stuff like that. Along with the rest of the world, we’d heard good things about Victoria Plumb, so again, it was a really quick job of falling in love and again, strangely, Husband going along with it…

Camberley Grey 800 Floor Drawer Unit & Basin

We got cooler, more modern, taps than these ones though…

The rest was decided by Husband’s refusal to significantly move the pipework, so in terms of the sink, loo and bath, they were staying where they were – and in fairness, I’m not sure if there would have been a better placement anyway. We’re both pretty long in stature, so we wanted a big bath, and the size of the room meant an ‘L’ shaped one was a perfect fit.

A couple of hours online and with tape measures in hand, we ordered our bathroom furniture through Victoria Plumb and taps and shower through Victorian Plumbing. Not to be confused with one another. Here it all is when it arrived;

DSC_0279

The dining room, yet again, doing an excellent job of builders yard…

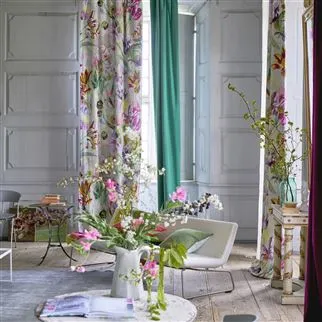
Here’s a little ‘moodboard’ of how it was all coming together in my mind…


So, this part of the process was all very straight forward – some might even say “enjoyable”. But don’t worry, as with every project in this house, it did all turn into a horrible saga.

But you can look forward to that in Part 2…

Posted in Our House | Tagged , , , , , , , , , , , , , , , , , , | 9 Comments

Pick of the week #18

It is a very tricky time of year to pick one single thing from this week to be my favourite. At the moment, all the fabric houses are bringing out their new A/W ’17 collections, so expect the theme to be fabrics, fabrics, fabrics over the next few weeks!

Number one, for me, is Romo. A big name in fabric and a staple supplier for me, along with the Abaris Holdings collection of brands – Harlequin/Sanderson/Scion/Anthology.

Anyway, Romo sits easily with me and my personal style. It’s usually relatively simple, lots of geometrics, and cool colour stories. Their price point means they’re easy to sell too, although some of their more intricate embroideries are towards the “How much?!?!” end of the scale.

They have two main new collections this season, Floris and Lorcan.

Floris is the bigger of the two, with a coordinating wall coverings collection. A few words they’ve used to describe it are “sleek”, “sophisticated” and “luxurious”. Sounds good.

Lorcan, then, is a smaller collection of printed fabrics, using the Linarabasecloth which is one of the biggest selling plains around. Sounds like a winning combination.

Here are some beautiful shots from their website to showcase the best of the new stuff. Enjoy.

Floris:

Image result for romo floris collection

Floris

Floris

Floris

So there seems to be two main colour stories here; orange/red, and teal/yellow, both with a healthy dose of metallics and textural weaves. Although I love it, it’s probably a bit too ‘glam’ for me and my own home.

Lorcan:

Lorcan

Lorcan

Lorcan

Lorcan

Obviously I love the predominantly blue colour story with these images, but to any die-hard Romo fan, this collection will come with a big sigh of relief that they’ve still got it. It is hugely reminiscent of the collections of yester-year, and surely shows Romo at it’s best. I love it.

Do you have a favourite? Let me know!

Posted in Inspiration, Pick of the week | Tagged , , , , , , , , , , , , , , | Leave a comment

Where have I been?

August has not been a productive month for this blog. Mainly because I went on holiday again. Or should I say, in Husband’s tone of voice, “Again?!” Because this time, I went without him. Mother was at a loose end so I gallantly offered myself as a holiday buddy to save on those pesky single occupancy charges. I know, I really fell on my sword with this one.

So, as a way of apology for missing what should have been at least 3 Pick of the Weeks, here’s some nice snappy snaps from Skala in Kefalonia, which is where we went…

It really is the most lovely, relaxing spot and was well worth Husband’s never ending jealousy glare.

Everyone loves a holiday – except those times that wind up with packing up your tent two days early because it won’t stop raining in the corner of the UK you decided would be great for a ‘staycation’. I always have major post-holiday blues on return to the UK. Food tastes better on holiday; colours are brighter and days longer.

I really feel as though the pops of yellow around our home were to serve as touches of Summer vibes, to keep us going through the Winter, as Husband and I are both very much ‘Summer People’. But I’m not sure it’s enough.

I know I yabber on about how much I like blue and have it every where at home, but I’ve never really experimented with this really bold sky blue in my interiors – I tend to be more of a navy or pastel blue user… I wonder if any of you guys have – and how has it worked out?

It’s such a bold colour, I think I’d worry about it getting on my nerves after a while… but maybe it would be ok as some little touches like a throw on the sofa, or a tablecloth maybe? I think it would be important to use such a strong colour as soft textures, rather than anything too solid otherwise it could look a bit cheap and plastic-y. Do you know what I mean?

I’m sure I could live with this dinky little Tropez cotton rug or Alize fringed throw, from Maisons Du Monde, for example…

TROPEZ beige cotton rug with blue motifs 50 x 80 cm ALIZÉ fringed throw in blue 125 x 150cm

I mean, who could say no to sky blue tassles?


In all seriousness, no more holidays planned for me this year, so I will do my best to get back on the writing train, and not leave you all on tenterhooks for another 3 weeks for your next update!… Watch this space.

Posted in Inspiration | Tagged , , , , , , , , , , , , , , , , , , , , | 1 Comment

Pick of the week #17

This week’s pick of the week is Loaf. I’m sure you’re all aware of the Interiors brand; its big news in the furniture world, and is becoming more accessible with an exclusive range of their home products now available to buy through the high street giant, John Lewis.

They do a huge range of all types of furniture, but I would say they’re probably most well-known for their sumptuous sofas and wow factor upholstered beds which are available in a plethora of striking colours.

Hugger winged back bed

The Hugger bed in Dusk vintage linen 

I’ve always been a fan of their sofas; their proportions are great, the colour options of their upholstery fabrics is fab (yes, there’s a bright yellow option or two!) and their designs are livable but just that bit different to the run of the mill option.

What I like too, is that all of their items are made in Great Britain, which is a claim hard to find these days. Just to prove it, there’s some fun pictures of their factory team, hard at work, on their website which is a really nice touch…

Having a cuppa in a KitKat mug. Can’t get more British than that!

What particularly caught my eye this week was the Oscar corner sofa, which was the main focus in a townhouse living room I visited on Friday;

Image result for loaf oscar corner sofa grey

Ok, so it doesn’t look much there, does it. Here’s a better picture of the chaise end option from the same range, but styled up a bit…

British made luxury Oscar Chaise corner sofa and Legsie footstool in shaker blue herringbone

The amazing, trans-formative effect of a scatter cushion or two…

Anyway, it’s seriously comfy, would easily fit both Husband and I on (which considering that at 6ft 1″, I am the smaller of the two of us is no mean feat) and most importantly of all, when I showed Husband a picture of it, he liked the way it looked too! The first time in all of history we have agreed on the look of a sofa. Hence why it’s worth a mention on here!

Needless to say that at the moment our pocket money won’t quite stretch to it (a little over £3k in my preferred indigo blue linen!) and our living room is not the right shape for a corner sofa at all, but watch this space people… we have our future sofa all lined up, ready for when we win the lottery and have moved to our dream palatial residence!

On a more realistic note, their website is definitely worth a gander if you’re looking for some rather lovely inspiration, mixing their super soft looking upholstery, with more industrial looking lighting and furniture to great effect.

Here’s what I mean, to whet your furniture-y appetite! Bon appetit…

Image result for loaf yellow sofa

The Dixie sofa in Bumblebee clever velvet. Obviously, I want this. Enough said.

Mimosa bed headboard has hand embroidered buttons in a luxury upholstered headboard

The Mimosa bed – the little patterned buttons are handmade in India, so every single one is individual. How lovely is that?!


Happy luxury luxury extra comfy British made Happy armchair

The Happy armchair in Cloud blue vintage linen. Considering how chuffed I’d be with this little purchase, I think the range name is very appropriate.

*All pictures for this post have been taken from loaf.com.

Hope you’re all having a nice weekend and thanks, as always, for reading!


Posted in Pick of the week | Tagged , , , , , , , , , , , , , , , | Leave a comment